Install React JS on Ubuntu 22.04 LTS

React. js is an open-source JavaScript library that is used for creating web frontend and UI components specifically for single-page applications. It’s used for handling the view layer for web and mobile apps. It is developed and maintained by Facebook and a large community of developers.
History of React JS
React was created by Jordan Walke, a software engineer at Facebook, who released an early prototype of React called “FaxJS”. It was first deployed on Facebook’s News Feed in 2011 and later on Instagram in 2012. And finally, it was open-sourced at JS Conference US in May 2013. And as a result, the Reacts first release was published in 2013.
In this tutorial, you will learn to install and create React Application on a Ubuntu Linux system.
View on Youtube:
Here are the major steps that you have to follow:
- –Install a few utility packages
- –Add Node Repository
- –Install Node JS
- –Create React App Utility
- –Finally Creating React App with Utility
Step 1 – Install Some Utility Packages and Update Repo:
install some necessary utility packages so Install the following dependencies required by this tutorial like software-properties-common ca-certificates lsb-release apt-transport-https etc.

Step 2 – Add Node Repository:
Well, by default Node. js version comes with Ubuntu 22.04 LTS is 12.22.9, but we currently want the latest version 16.15. So, we need to add PPA sources which are required to be able to install NodeJS 16 on your Ubuntu 22.04 LTS.
Add the Node.js 16 (current stable version) PPA to your Ubuntu system
curl -sL https://deb.nodesource.com/setup_16.x | sudo bash -

sudo apt update
Step 3 – Install Node JS:
Node.js is required to create and run a React.js application. The following steps will install Node.js 16 on your Ubuntu system. or click here to choose your desired version. Next, run the following command to install the Node.js to your system:
sudo apt install -y nodejsCheck the currently active version of Node.js
node --version Also, you can check npm version using.
npm --versionAlso, you can check npx version using.
npx --version
Step 3–Create React App Installer Utility Package:
You need to install create-react-app a utility package in your system.
sudo npm -g install create-react-app 
Step 4 – Create A New React Application
create-react-app myapp On successful application creation, you will see a long result on the screen. In the end, you will find the result like below with some useful commands.

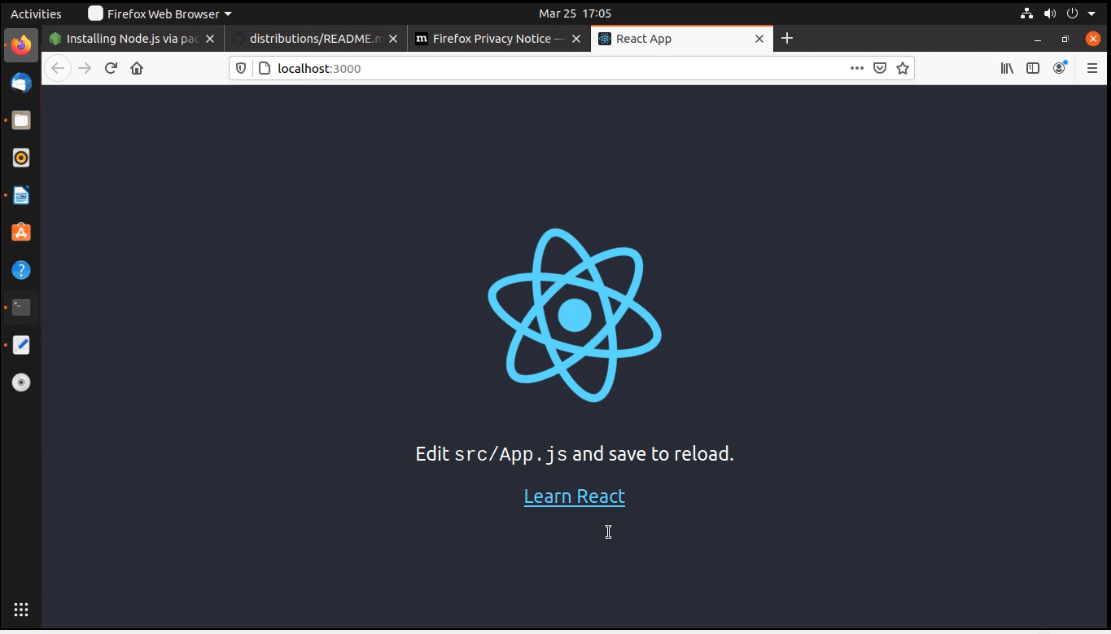
Step 5 – Start React Application
Once you have created your React application. This will create a folder in the current directory with the project name. Switch to that project and run yarn start to start the application.
cd myappnpm start
The default reacts application starts on port 3000. Access your React application using 3000 port with the system IP address. For local machines use “localhost” followed by port.
Let’s create an awesome user interface with React.
Conclusion
In this tutorial, you have learned, how to set up the React.js development environment and access the application in a web browser. Additionally, you found instructions to create a production build of your React application.
Subroto Mondal
Latest posts by Subroto Mondal (see all)
- Installing and Configuring OpenShift: A Step-by-Step Guide for Linux Experts with Terminal Code - February 19, 2023
- Sed Command in Linux with Practical Examples - February 19, 2023
- Rsync Command uses with examples - February 19, 2023

- subroto
I like Programming and New Technologies. And work with Linux.
- Installing and Configuring OpenShift: A Step-by-Step Guide for Linux Experts with Terminal Code February 19, 2023
- Sed Command in Linux with Practical Examples February 19, 2023
- Rsync Command uses with examples February 19, 2023
- How to Install WordPress with Nginx on Ubuntu 22.04 August 12, 2022
- Install React JS on Ubuntu 22.04 LTS August 1, 2022